This guide explains how to set up your CiraSync On Premise tenant after installation. Follow the steps below to complete the setup process:
Instructions
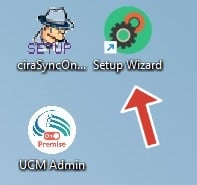
1. Once the Installation Wizard completes, the Setup Wizard will open automatically. If it does not open, the user can manually launch it by clicking the icon on the desktop.
2. Start by clicking on the Service Mailbox Setup tile in the CiraSync On Premise installation wizard. (Refer to the figure below for guidance.)

3. Choose your tenant’s Exchange environment from the available options.

4. For this example, select Exchange. The wizard will display the Select Microsoft Exchange Service Account section. (See figure below.)

5. In the Direct URL field, enter the URL to your tenant’s Exchange database using the following format:https://<mail.server>/ews/exchange.asmx
Note that “mail.server” is a placeholder for your Exchange server’s name.

6. Click Validate to confirm the URL. A pop-up will appear indicating the validation status.

7. Click Next to proceed. The Contact Info window will appear.
8. In the Email Address field, enter the email address you wish to use as the BOP/Itrezzo admin. The system will auto-populate additional details from the Global Address List (GAL).

9. In the Authorization Code field, click Get to generate the code.

10. Check the Request Trial License Pack checkbox to enable a trial license.

11.Click Next. At this stage, CiraSync On-Premise will send two emails: one confirming the CiraSync On-Premise registration and another containing the authorization code and trial license details.
Note: The Support team will receive the trial license request and issue the trial license pack. The pack will be sent via email and will require import.
Note: CiraSync On Premise provides a one-month trial license pack for 10 users. To activate the trial, follow the instructions in the automated email or refer to the “How to Install CiraSync On Premise License Packs” guide.

12. Check the boxes for Start all services and Launch Web Administrator to activate the services and open the admin console.

13. Complete the setup by clicking Finish.
Your Itrezzo tenant is now set up and ready to use!