CiraSync requires authentication to access Azure Active Directory (Azure AD) and Exchange Online for syncing contacts and calendars. This authentication can be configured using Application Consent or Certificate-Based Authorization, depending on the environment.
Authentication Methods: App Consent vs. Certificate-Based Authorization
1. Application Consent
Application Consent allows CiraSync to request permissions on behalf of users to access Azure AD and Exchange Online. This method requires periodic renewal but is simple to set up.
2. Certificate-Based Authorization
Certificate-Based Authorization provides a secure and automated way to authenticate CiraSync using digital certificates. This method is recommended for organizations that prefer long-term authorization without manual renewal.
Setting Up Application Consent
To configure Application Consent, follow these steps:
Setting Up Application Consent
To configure Application Consent, follow these steps:
1. Navigate to Certificates and Consent in the CiraSync dashboard.

2. Click Grant Access.
![]()
3. Click Add Application Consent.
![]()
4. Click Grant Consents Automatically to allow CiraSync to configure permissions. You can also configure manually but we recommend doing it automatically.
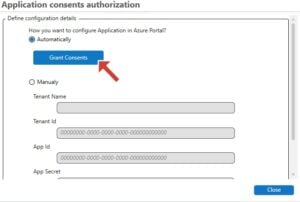
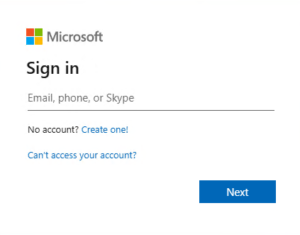
5. A prompt will ask you to sign in with a Global Admin account.
6. Click Close. (The process is complete when consent is successfully granted.)
Setting Up Certificate-Based Authorization
To set up Certificate-Based Authorization, follow these steps:
1. Open UCM Admin portal
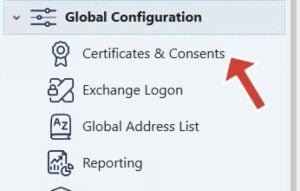
2. Navigate to Global Configuration and click Certificates and Consent in the navigation menu.
3. Click Grant Access.

4. Click Add Certificate.

3. Select Automatically generate a certificate.
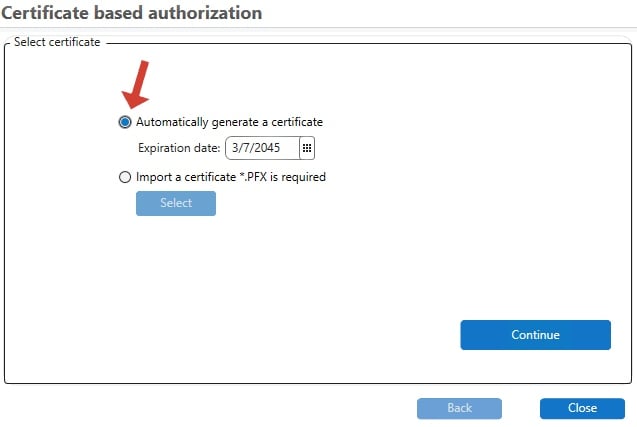
4. Select the Automatically method and select Add Global Reader role for the application and Add Directory.Read.All permission for the application
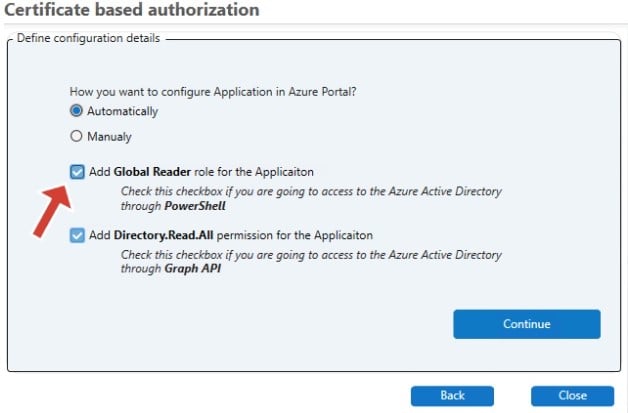
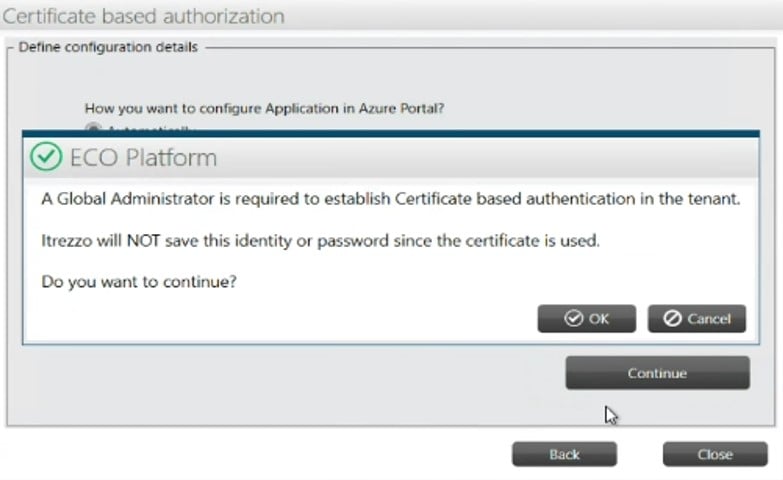
5. You need a Global admin to setup the certificate base authentication.
6. Once you enter the Global Admin credentials certificate will be listed in our portal.
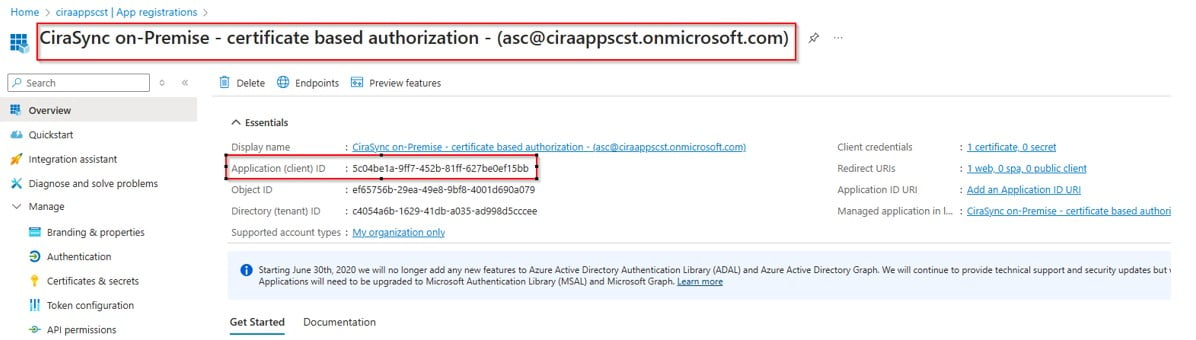
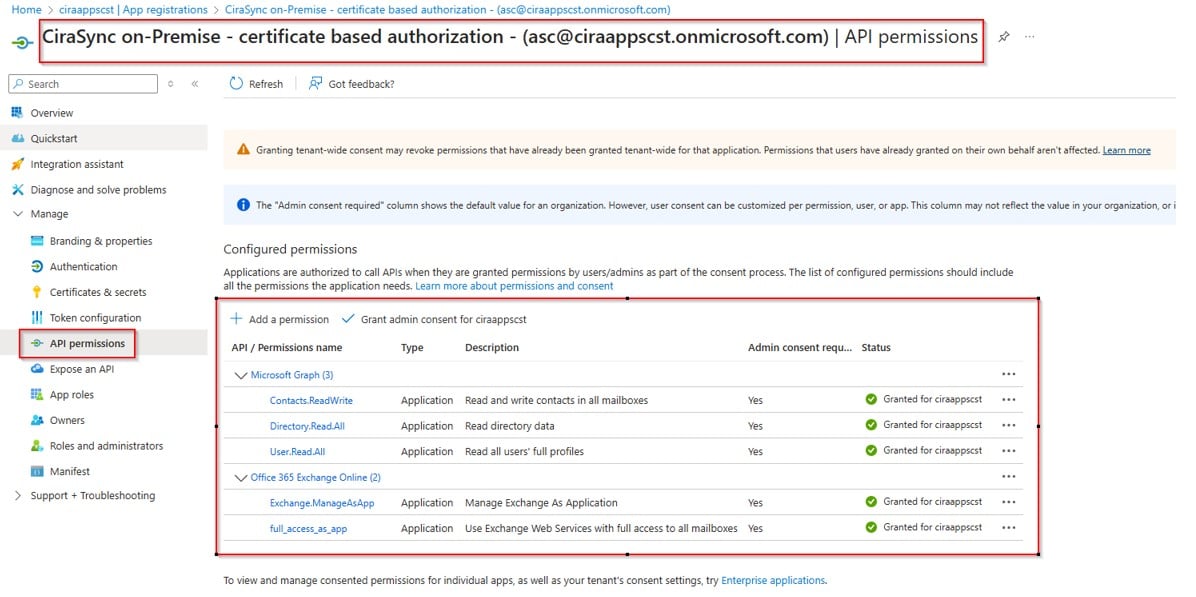
7. To match the application ID and confirm the permission please ask the admin to login to portal.azure.com.
- Ø ENTRA ID –> Manage –> App registration –> CiraSync On – Premise – Certificate based Authorization
Note: Once you setup the certificate base authentication then as per the configuration please update the certificate under Dynamic Over ride or exchange logon.