If you are a CiraSync customer and have more than 1000 user mailboxes in Exchange Online, you will notice that when a sync task is run, five mailboxes get updated simultaneously. Normally, a single Service Account is configured for CiraSync and it can take over one day to update 1000 mailboxes.
This post will help you to take necessary steps to speed up the sync process using Multiple Service accounts.
Sample Calculations
We will use an example where it takes five minutes to update an individual mailbox. If five mailboxes are updated at once, that means a mailbox is being synced almost once every one minute.
With that speed, CiraSync can update 600 mailboxes in 10 hours (Ten hours = 600 minutes) or 20 hours to update 1200 mailboxes.
If you are syncing a huge contact list to user mailboxes, it may even take 10 minutes to update a single mailbox. With five parallel updates, that would mean completing a sync once every two minutes.
What would happen if your tenant had 3000 licensed CiraSync users getting synced at the rate of 10 minutes per mailbox ?
For 3000 users getting synced at 10 minutes per mailbox, a rough calculation is that it takes 30,000 minutes (i.e. 500 hours). With Five threads (simultaneous updates) using one Service Account, the sync task will take about 100 hours or about 4 days to complete.
So, how can I speed this up?
By configuring CiraSync with Multiple Service accounts, you increase the number of parallel tasks in multiples of five.
This simply means one Service Account is able to run Five EWS threads at the same time. Thus, if you have four service accounts, a synchronization task will be able to run 20 threads at once.
Each thread updates one mailbox so you can have 20 simultaneous mailbox updates at one time.
Using the examples above, this could reduce the overall time of completion from 4 days to just one day.
Setting up a CiraSync tenant to be able to use Multiple Service accounts
The multiple service account feature is not enabled by default.
To enable your CiraSync tenant for multiple service accounts with Office 365, create a support request for this feature by sending an email to support at cirasync.com.
You may already have a dedicated service account for CiraSync. Now you will need to create one or more Service Accounts for CiraSync.
To do this, follow the below steps. After each service account is created, you will use it to login to the CiraSync dashboard and grant consent to the CiraSync Azure Application and acquire token.
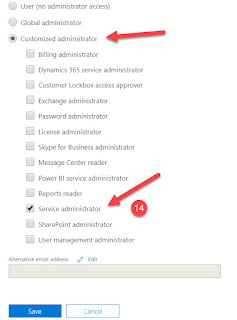
Each new service account will need the role of ‚Application Impersonation‘ and Global Administrator. However, after the fist login, you can change the service account from Global Administrator to Service Administrator in Office 365.
Here is a step by step guide for it.
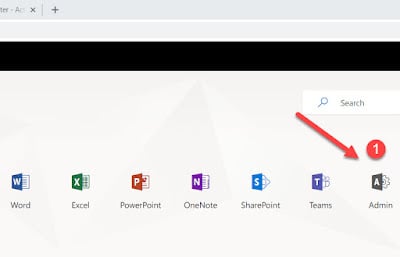
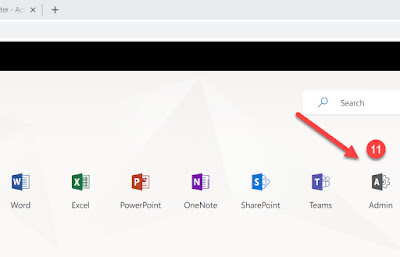
- Login to your Office 365 portal as a Global Administrator and Navigate to Office 365 Admin Center by clicking on Admin

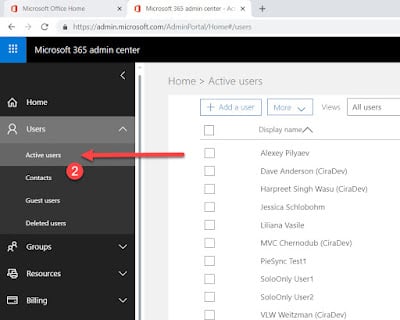
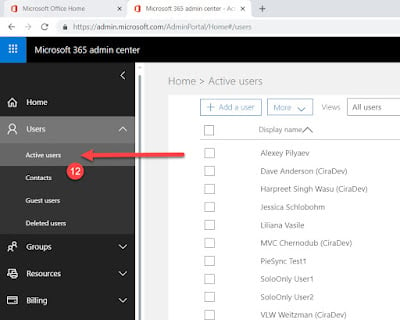
- Click on Users > Active Users

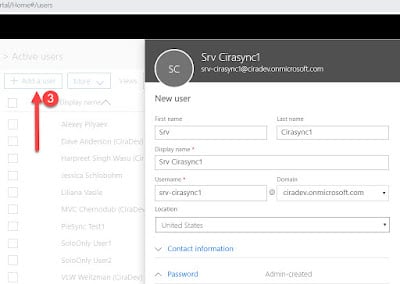
- Click on Add a User. Fill in the required details – First Name, Display Name. We recommend you use a consistent service account Display name to identify each account.Set a strong Password and make it a Global Administrator. If you are syncing Public Folders, assign a License to the Service Account – any License that will have an Exchange Online plan is needed so a mailbox is created for the Service Account.

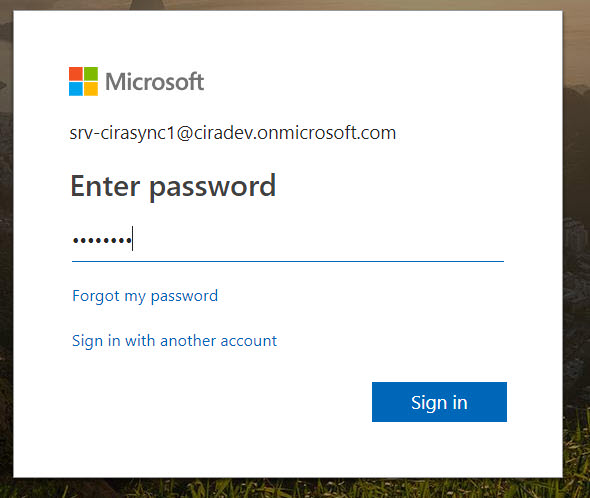
- Once the new account is created, use a different browser. or use an IR/EdgeIn-Private window. In Google Chrome, use an Incognito window and navigate to https://dashboard.cirasync.com.
Login to the portal with the newly created Service Account.


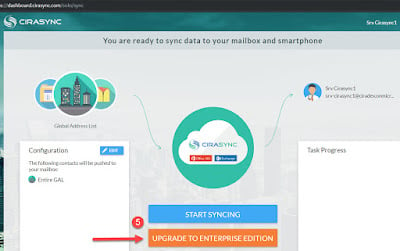
- In the screen snapshot shown below, you are initially entering as aPersonal Edition User. You will need to click on Upgrade to Enterprise Edition to sign-in as Enterprise Edition user.

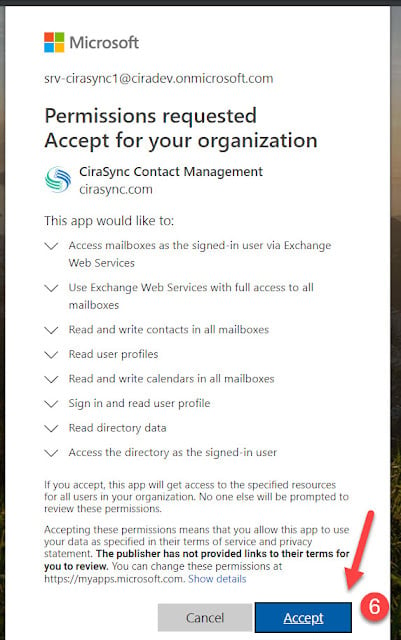
- Give your consent by allowing the CiraSync to access your tenant using the new service account. At the prompt shown below, Permissions requested Accept for organization, click Accept.

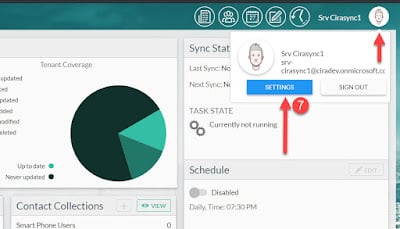
- Make this new identity a Service account in CiraSync. On the upper right corner, click on the username you are signed-in with and select Settings.

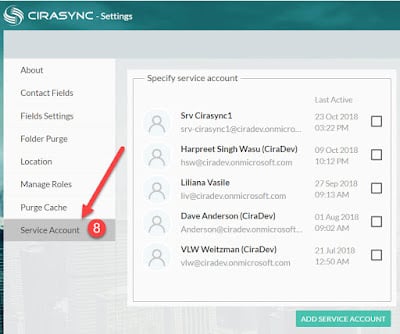
- From the navigation pane on the left, select Service Account option as shown below.

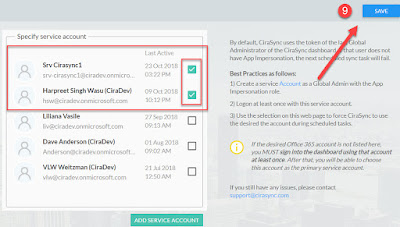
- Here you can view all the accounts from Office 365 that have been used to sign-in to CiraSync dashboard or have been added to be used as Service Account for CiraSync.
Check the boxes next to all the accounts you want to use as Service Account for CiraSync and click on Save.

- Once you choose the Service accounts for Cirasync and Save the changes the screen will show you the selected service accounts and the Save button will show grayed out.

After you the service account is locked successfully, logout from CiraSync dashboard portal.Following the above steps, you can add and lock multiple service accounts for CiraSync. Once you lock the required number of service accounts for CiraSync, you can change the role of these service accounts from Global Administrator to Service Administrator in Office 365.Follow the below steps for it: - Login to your Office 365 portal as a Global Administrator and Navigate to Office 365 Admin Center by clicking on Admin.

- Click on Users > Active Users.

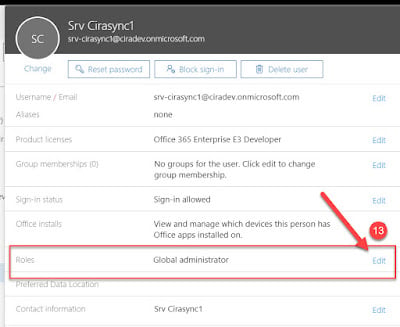
- Select the account that has to be changed from Global Admin to Service Admin. Click on Edit next to Roles.

- Click on Customized Administrator radio button and then check mark the box next to Service Administrator and click on Save.

Now that you have locked the Service accounts for CiraSync, don’t forget to give Application Impersonation role to these service account.
For step by step instructions, check out our blog post for How to Set Impersonation Mode for GAL or Public Folder Sync to User Mailboxes
If you have any questions or feedback regarding this process and working, feel free to reach our excellent customer support team at [email protected]

